

First Steps
This guide walks you through the first steps of using the FlexConnect API:
- Receive instructions via email.
- Download the development client.
- Prepare the API credentials file.
- Launch the development client and explore the available endpoints.
- Try the most common requests for monitoring nodes, applying power schedules, and reading historical meter values.
Instructions via Email
Email with Instructions
The FlexHome․Energy cloud team sends you an email containing:
- This guide as a PDF.
- A link to download the FlexConnect — FlexCloudClient API.
- The identifiers of your batteries, which you use to control them.
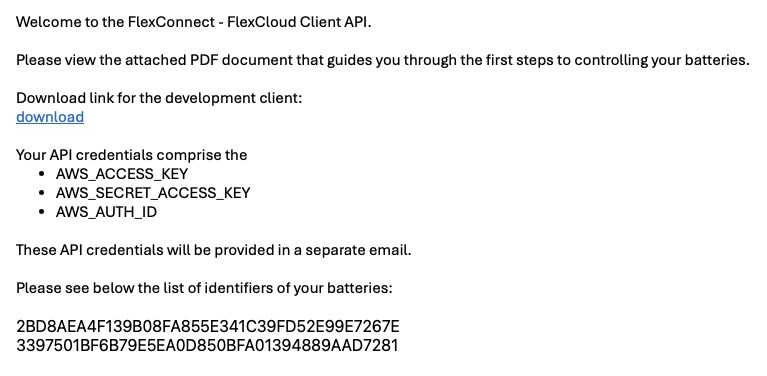
Email with API Credentials
The FlexHome․Energy cloud team sends you a second email containing values for:
AWS_ACCESS_KEYAWS_SECRET_ACCESS_KEYAWS_AUTH_ID
These values are required for authentication on the FlexCloud platform and must be specified in the .env file of the development client. :::
Download the Development Client
The development client provides a local HTTP interface for accessing the FlexCloud platform. It is distributed as an executable file for Windows, Linux, and macOS.
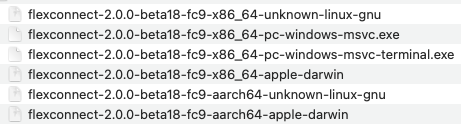
- Create a new folder.
- Use the link provided in the instructions email to download the software.
- Save the software to the new folder.
Prepare the API Credentials File
- Navigate to the folder containing the development client.
- Create a new text file in that folder.
- Paste the following content into the file:
# ===== AWS Connection =====
AWS_REGION=eu-central-1
AWS_IOT_ENDPOINT=a81witq9oqwz4-ats.iot.eu-central-1.amazonaws.com
# --- AWS Credentials ---
AWS_ACCESS_KEY_ID=
AWS_SECRET_ACCESS_KEY=
AWS_AUTH_ID=

# ===== Settings =====
PORT=8080
HOSTNAME=0.0.0.0- Use the values provided in the credentials email for:
AWS_ACCESS_KEY_IDAWS_SECRET_ACCESS_KEYAWS_AUTH_ID
- Save the file as
.env.
View and Control a Battery
Launch and View the Development Client
Run the development client. It reads the
.envfile and connects to the FlexCloud platform.
Open a browser window and navigate to
http://localhost:8080. The view shows a number of URIs: | URI | Description | HTTP Method | | --- | --- | --- | |/| The directory list | GET | |/version| The version of the development client | GET | |/doc| Machine-readable JSON documentation | GET | |/swagger| Documentation in the Swagger type | GET | |/scalar| Documentation in the Scalar type | GET | |/ui| Link to/scalar| GET | |/app/v1/*| Requests | POST |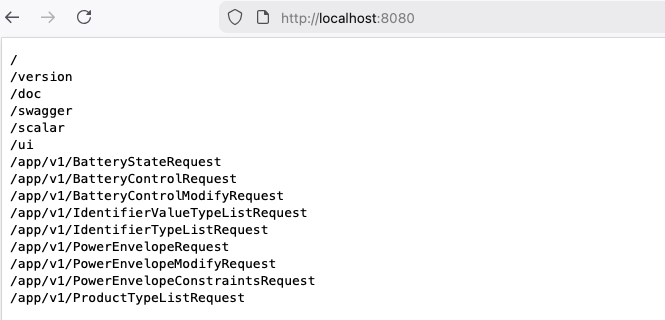
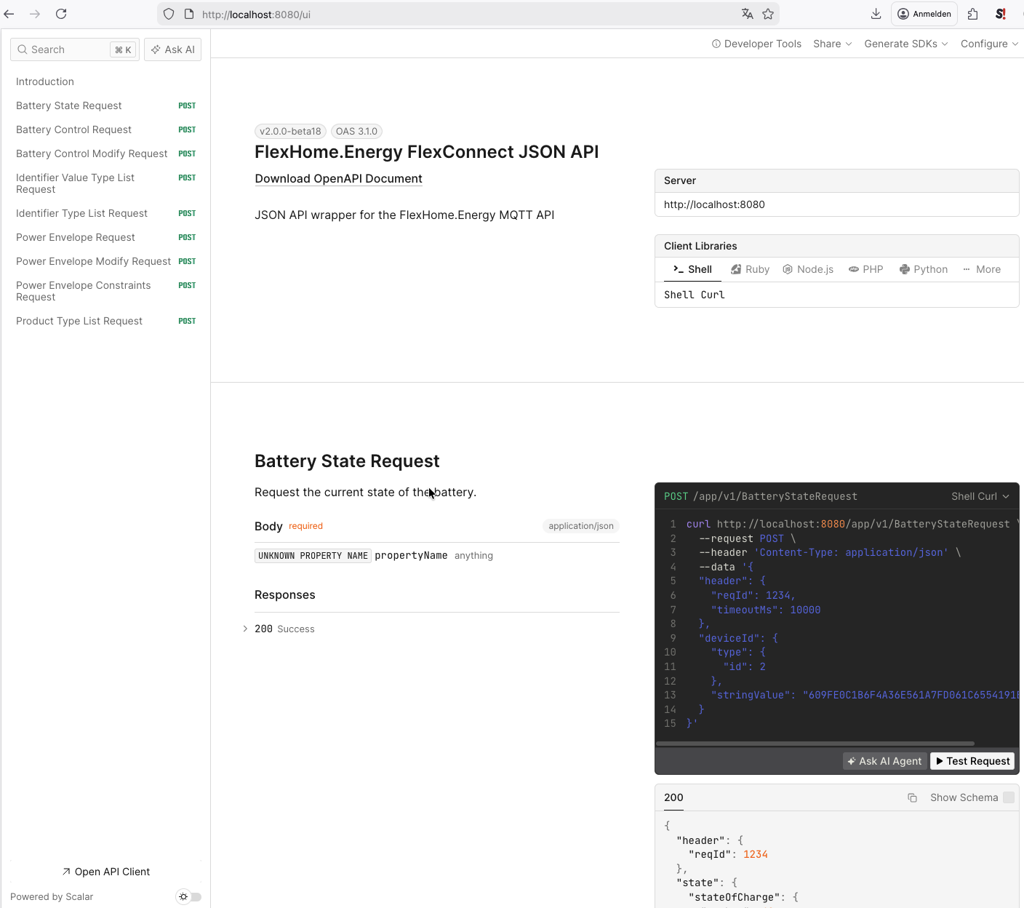
Navigate to the UI at
http://localhost:8080/ui:- View the available endpoints on the top left.
- Change the language on the right in Client Libraries to change the examples to different programming languages.
- Use the built-in functionality to try out the first examples — click Test Request.
Try the Most Common Requests
Once the development client is running and you can see the endpoint list at http://localhost:8080/ui, the following three requests cover the most common use cases. Each has its own dedicated page with full request and response examples, field tables, and a description of every detail attribute.
Read the current state of one or more nodes
Use NodeStateListRequest to retrieve the current connection, operation, control, battery, and power state of one or more nodes in a single call.
Typical use cases:
- Polling a dashboard for live state across a fleet of nodes.
- Checking whether a node is reachable (
connectionState) and operating normally (operationState) before sending control commands. - Inspecting which power schedule is currently active on a node (
powerState.scheduleId).
Apply a power schedule to one or more nodes
Use NodeControlPowerScheduleModifyRequest to apply a power schedule to one or more nodes — either by referencing an existing schedule by id, or by providing an ad-hoc definition that the platform creates and applies in a single call.
Typical use cases:
- Charging or discharging a node, or a group of nodes, with a defined power setpoint over a specific time range.
- Switching a node to a specific control state for a given period (for example,
POWERfor energy trading). - Running short, one-off control actions via an ad-hoc schedule without a separate create step.
See the Power Schedules page for background on schedule sets, priorities, and control states.
Read historical meter values of a node
Use NodeMeterReadingListRequest to retrieve historical meter readings of a single node over a specified time range — cumulative charged (positiveEnergy) and discharged (negativeEnergy) energy in kWh, plus the schedule and control state that were in effect at each sample.
Typical use cases:
- Billing and energy reporting.
- Charts of charge/discharge behaviour over time.
- Verifying that a specific schedule was actually in effect during a given time window.